HONORS

About Honors
For biology honors, each student spends a minimum of 12 hours on a project that goes in depth into one biology concept. This project is designed by the student, and must be signed off on by Lucas.
HONORS

The Script
Think of one of the world’s deadliest creatures.
No, not that one.
Or that one.
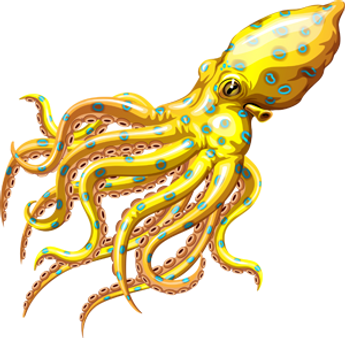
That’s it. (THE BLUE RINGED OCTOPUS)
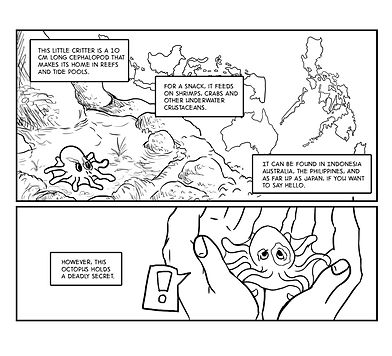
This little critter is a 10 cm long cephalopod that makes its home in reefs and tide pools.
For a snack, it feeds on shrimps, crabs and other underwater arthropods.
It can be found in Indonesia, Australia, the Philippines, and as far up as Japan, if you want to say hello.
However, this octopus has a deadly defense.
When it feels threatened, it bites, releasing a deadly toxin called tetrodotoxin, or TTX for short. If ignored, this venom can kill a human in as little as 20 minutes.
The Script
Page One
Why I chose this project
For my honors project, I made a comic about a little critter called the Blue-Ringed Octopus. I chose the octopus because I wanted to appeal to a younger audience by showing kids what I loved to see when I was younger: gore. When I was about six, I was absolutely fascinated by a book series my friend owned called Horrible Histories. These books outlined life in different eras, focusing especially hard on all the gory details. While I was reading the series because I was both fascinated and disgusted by exactly how a guillotine worked, I was also learning a lot about the Middle Ages and Roman Empire, subjects I wouldn’t have been exposed to otherwise at such a young age.
For my project, the Blue-Ringed Octopus was a perfect candidate for introducing biological concepts through the lens of gore. One unique feature of the Blue-Ringed Octopus is it’s toxin, which can paralyse throat muscles and lead to death. I focused on this toxin for most of my comic, putting emphasis on all the harm it can do to humans, because that scary aspect was what would have interested me if I read the comic when I was younger. However, I also included more ordinary facts about the animal, like it’s diet and habitat, as well as larger scientific terms that kids may not have been exposed to. That way, I could hook a kids attention with a gory subject, while also teaching them basic biological concepts in a way that doesn’t bore them.

Thumbnails and Script
I started the actual comic by creating a script in tandem with a basic outline of what I was going to draw called a thumbnail. This step is the most important, because a good thumbnail lays the foundations for the positioning of each element in comic. All the information in the comic needed to flow logically from one panel to the next, without the reader becoming lost. In order to do this, I drew arrows over my thumbnails to indicate how each element i the panel was supposed to be read. I also had to make some changes to the script at this stage. Because I was working with a very large font, some words needed to be changed or removed so that the text wouldn't crowd out the images.
My Process
Inking
Now, it was time to start drawing the comic. Using a drawing tablet and Photoshop, I redrew each thumbnail with a black brush, adding more detail to the comic. For things that were difficult for me to draw, like the tiger in the first panel, or things that needed to be very accurate, like the organs of the crab, I partially traced over references found online. Most of the comic was drawn with photo references as well, as I had never drawn a gun or bear and I wanted the comic to look as realistic as possible.
Research
Before I started to work on the comic, I did some research on the Blue-Ringed Octopus. I visited a few different Marine Biology websites, and took notes on the most important details about the octopus, including where it lived, what it ate, and, most importantly, how its toxin worked. When I had all the most important details written down, I looked through them to figure out what order I should put them in for the comic proper. These notes later turned into my script.


Coloring
The most difficult step for me was deciding how to color the comic. As funny as it sounds, there's a lot of different ways I could have colored the comic; cell shading, lineless, or fully rendered figures were all options I was considering. In the end, I went with a watercolor style, as it was the easiest to do and produced an effect similar to a children's picture book.
Overlay Layers
After the whole panel had been colored in, I added layers to edit the colors to make the panel more cohesive. Some layers made the panel more or less brightly colored, made the panel bluer, or made the panel appear more grainy to mimic the look of watercolor paper. In some cases, I completely changed the color of certain parts of the panel to make them stand out more or less.


Putting it all together
The final step was putting everything together. I added in speech bubbles, moved around the pictures, and edited the final bits of text to make sure the comic was as readable as possible. Once this step was done, I flattened the comic, or combined every layer into one, and saved each image as a high resolution JPG file.